
I find that many people struggle with pie crust. The ladies before me in my family never had this issue and taught me to make it from scratch and its very easy. There is a simple technique to getting the desired flakiness, which I will share here.
But first, let’s address expectations. I wonder if people are expecting pie crust to be different than it is. Old fashioned pie crust is not sweet, its flaky, kinda dry and somewhat salty. It is meant to contrast with the sweet filling, but can also be used with a savory pie. Graham cracker crusts and cobbler crumbles are a different sort of thing. Below I am sharing the recipe used by my family. It is very basic and could be seasoned or flavored in many ways.
For a single one-crust pie:
- 1 1/2 Cup All-Purpose Flour
- 1/2 teaspoon Salt
- 1/2 Cup Lard (cool, room-temp)
- 1/4 Cup plus a Tablespoon or so COLD Water (just put it in the freezer before you start)
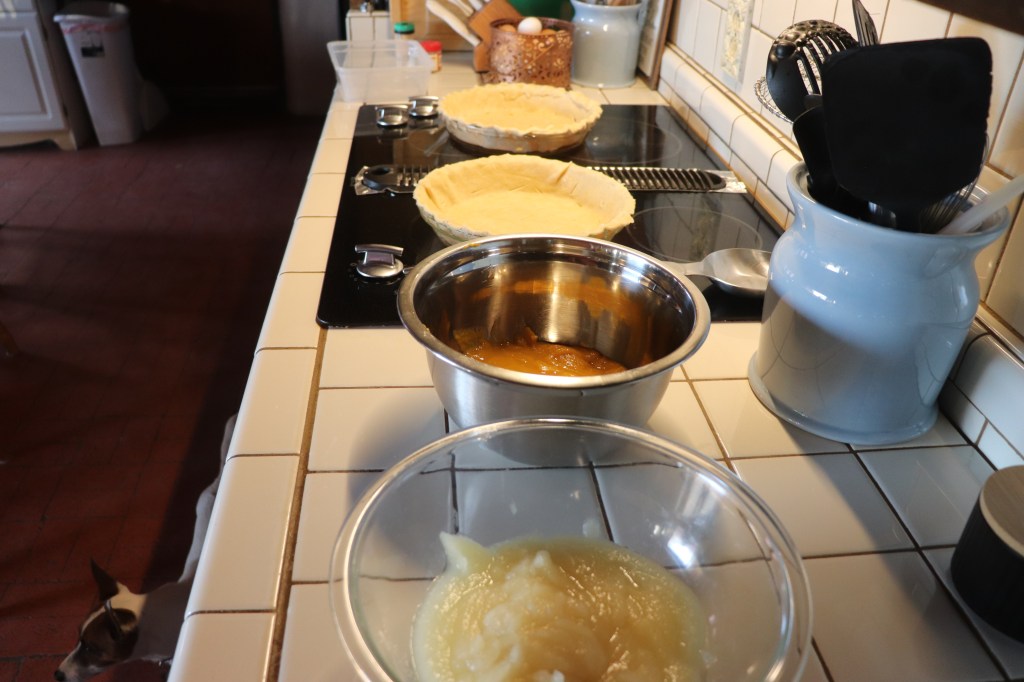
This recipe can be multiplied as many times as you wish. In the following photos, I was baking two pumpkin pies and an apple pie, so I quadrupled it to have a top and bottom crust for the apple pie, and one each for the pumpkin.
Measure your flour and salt into the bowl, and then measure in your lard. At this point, you can use a pastry cutter but I don’t. I had one for years but it finally broke and I haven’t replaced it because I really don’t see a need. I was originally taught to use a fork, so that’s just what I do now. With the back of a fork, start mashing the lard into the flour. This is the big technique. continue to do so until all the flour has been incorporated with the lard. the result will be a mealy looking, dry mixture.

As you can see in the picture above, the lard is now in tiny bits. Even those bigger crumbs are equal parts flour and lard. Adding very cold water is important because you don’t want the lard to melt at all. That is the next step. As you can see from my frosty measuring cup, it sat in the freezer for about 20 minutes, or so.

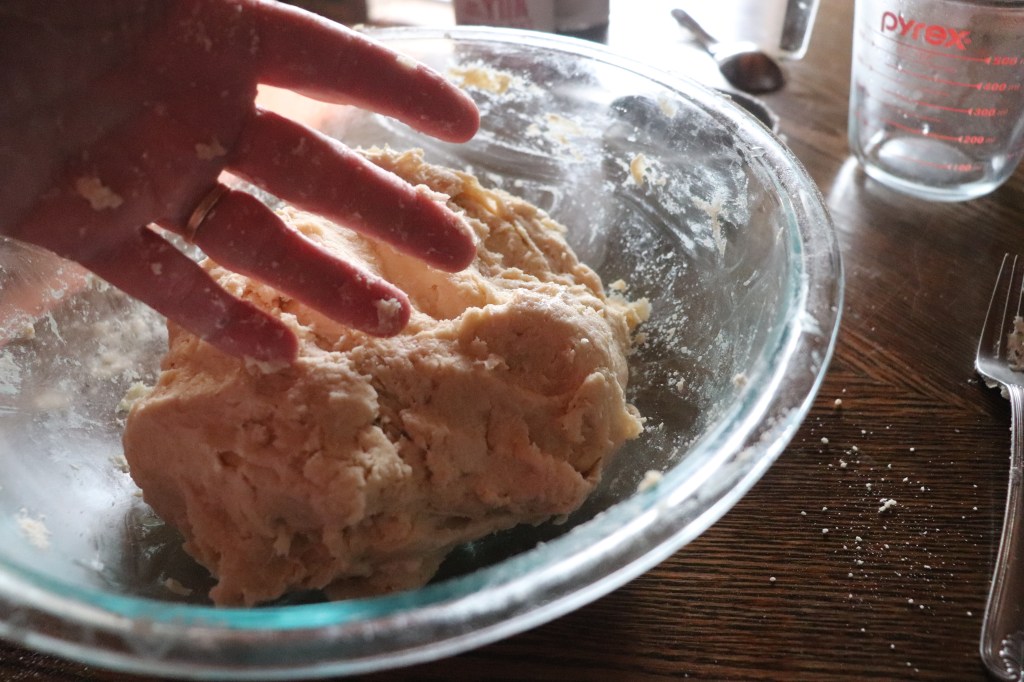
The water measurement is an approximation because it depends on how much it takes to hydrate the flour. add the water and begin to move the flour into it, adding just enough to bring the dough together. It shouldn’t be sticky, but it will feel pretty greasy.

It’s forming clumps but it’s not wet. and it shouldn’t stick to your hands. Use your hands to mix it just enough to incorporate the flour but not so much that the warmth of your hands melts the lard or overworks the lard/flour grains.
Flour your work surface…

Shape the dough into a ball and flour the top. You can see how shaggy the dough is here. That’s fine. This was four crusts, so I divided them.

Wow. Looks like a brain…

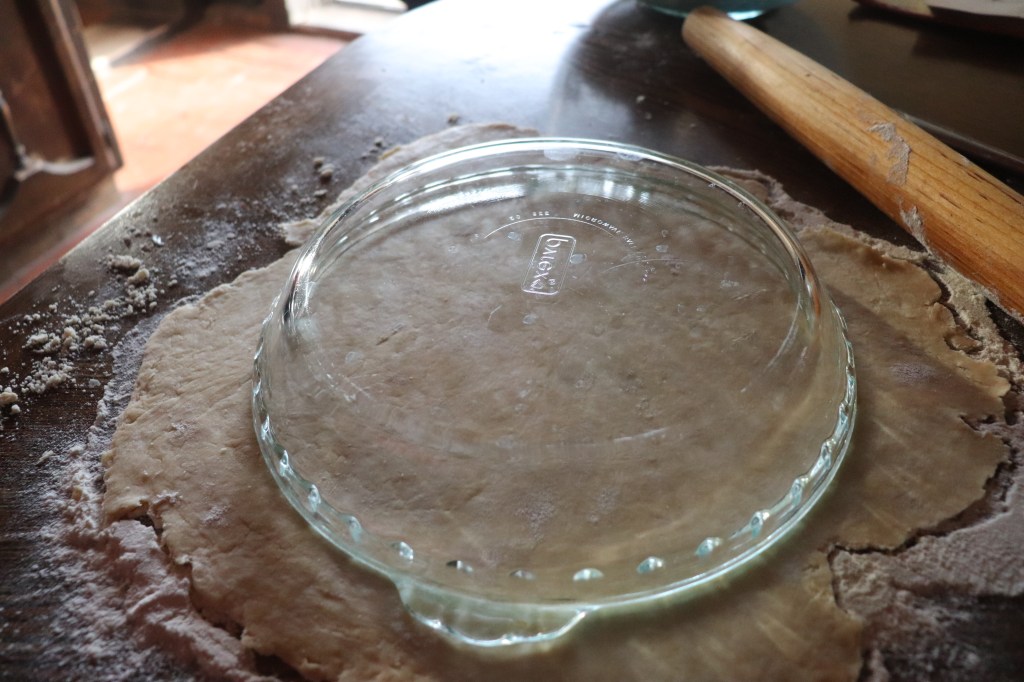
As I was saying, round it out and roll it out. Use your pie pan to make sure it’s big enough all the way around, allowing for the depth of the dish.
Using a nice, flat turner/spatchula, fold it into forths…
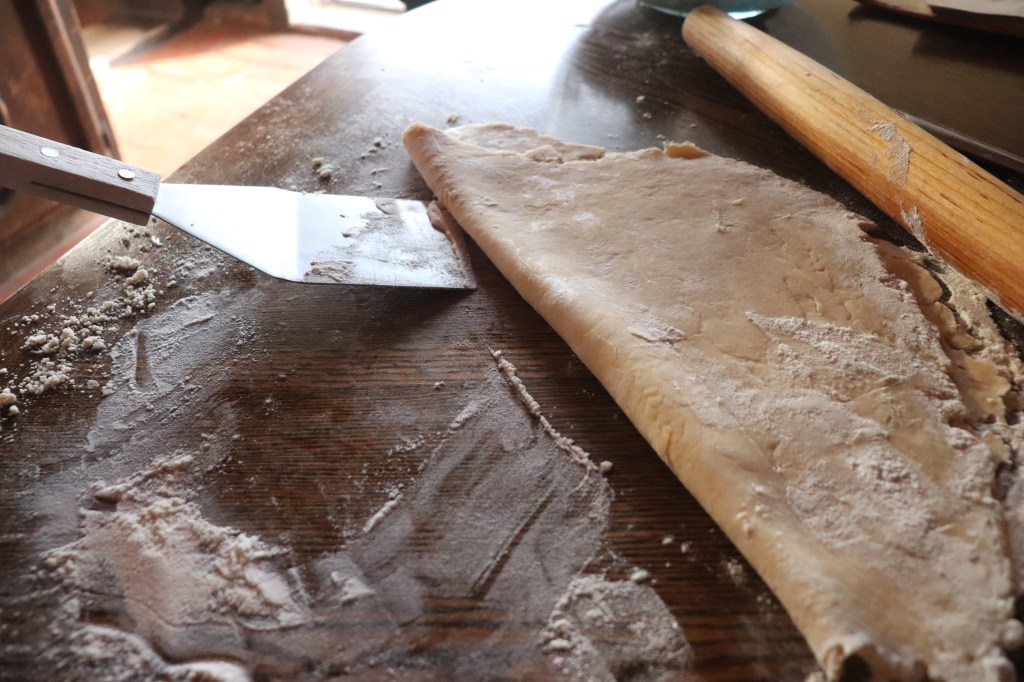

This makes it easier to move around. You can wrap it in plastic or beeswax wrap and refrigerate it at this point if you’re making it ahead.
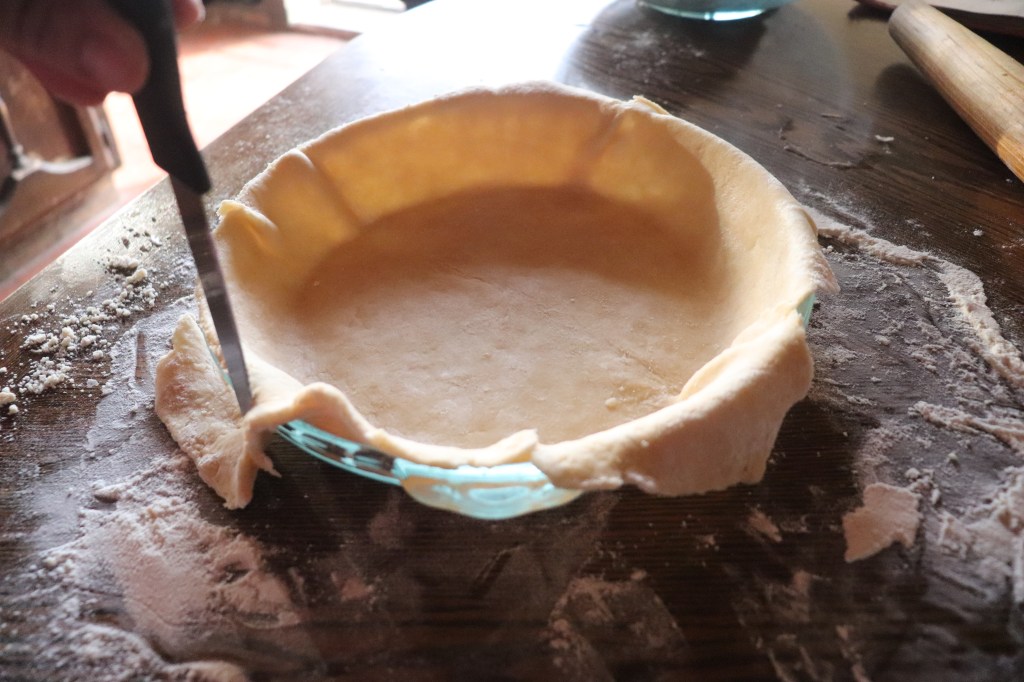
Unfold, adjust, trim, and get creative with the edge. Set the scraps aside for a decorative touch later on…

Before baking, you’ll want to poke holes in the bottom and up the sides a little bit to keep it from puffing up during the bake. At this point, it’s ready to get filled or again, you can refrigerate for later. I do put them in the fridge while I’m waiting for others to bake just to keep that lard cool.
Next, we’ll work on the filling.

Here, I am thawing my pumpkin puree. I have some Winter Luxury Pumpkin and some Blanco Pumpkin. I grew this pumpkin and preserved it for this use. I have a Youtube video all about how to take a raw pumpkin and make it edible. You can see that below.
FIlling recipe I use for one Pumpkin Pie:
- 2 Cups Pumpkin Puree
- 2 Eggs
- 3/4 Cup Sugar
- 1/2 teaspoon Salt
- 1 teaspoon Cinnamon
- 1/2 teaspoon Ground Ginger
- 1/4 teaspoon Ground Cloves
- 1 2/3 Cups Evaporated Milk
Egg Wash (whisk together)
- 1 Egg
- 1 Tablespoon of water
Preheat oven to 425 F. Combine all ingredients well. You can use a mixer but it isn’t really necessary. I opted out of that because I wanted to keep my pie varieties separated for color and flavor. Once the oven is preheated, set your prepared crusts on the oven rack with it pulled out. THEN, pour the filling in the crusts. Pumpkin pie filling is very soupy, so this is the least messy way. Brush your egg wash onto any exposed crust for a nice glossy finish. Bake them for 15 minutes. Reduce the Temperate to 350 F and bake another 45 minutes.

Now, take your crust scraps that you cut off earlier and roll them out on a sheet of parchment (do what I say, not what I do, heh…) Use some cookie cutters and toothpicks to play with designs. These were for Pumpkin Pie in the fall, but the possibilities are endless.
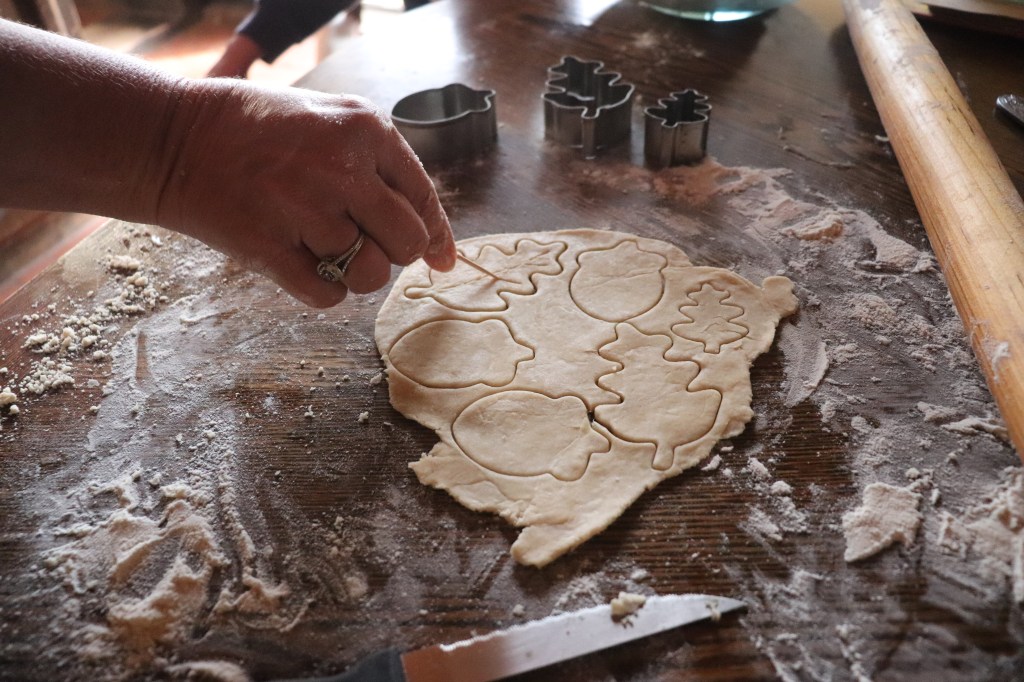

Egg Wash your decorations and bake them for about 15 minutes on the bottom rack, just until they are set. When the filling starts to solidify, about 30 minutes into baking, you can open the oven and place these on top of your pies.

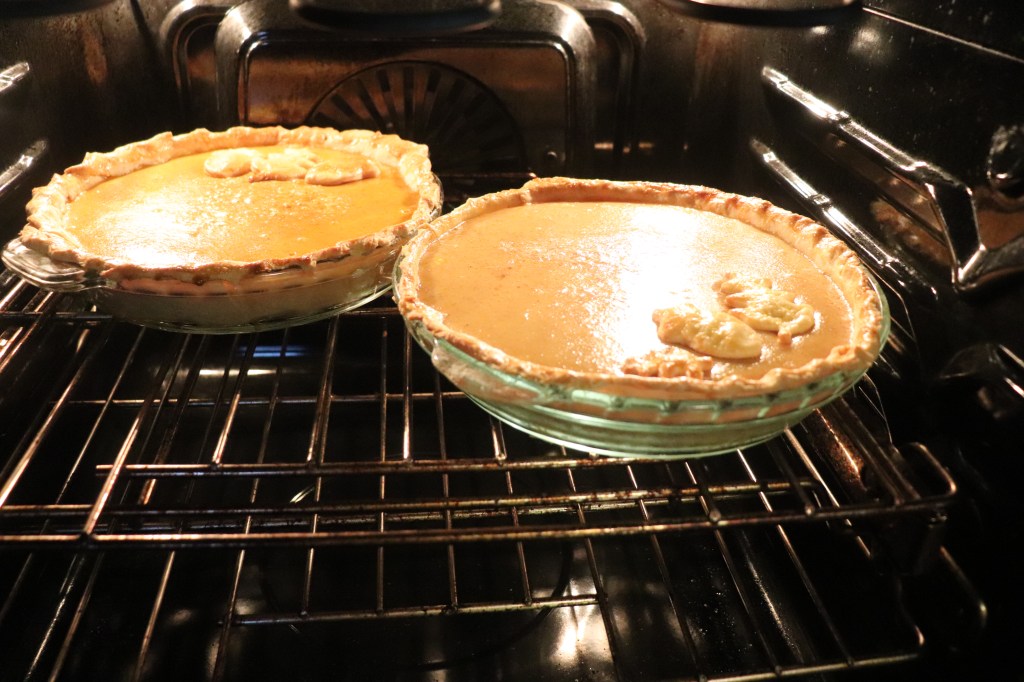
You will know they are finished when a toothpick inserted in the middle comes out clean. I didn’t get any good photos of the finished product (aforementioned munchkins had me distracted) but I hope this dispels the myth of the impossible pie crust and gives you a new-old fashioned recipe to inspire your return to simplicity. Please comment for questions or whatever I inevitably left out. Be blessed.

